¶ Creating the Override
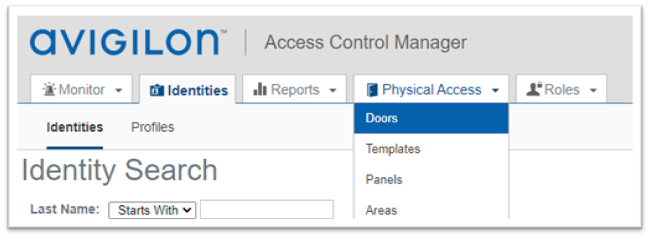
- Login to ACM
- Hover over Physical Access
- Click Doors
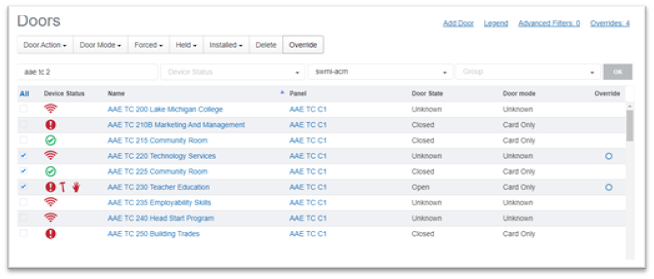
- Select the door(s) that need to be scheduled
- NOTE Click All to select all the doors
- Click the Override Button
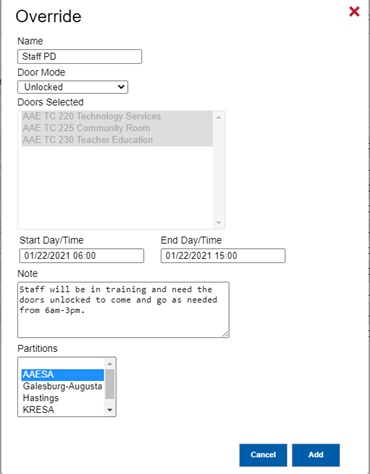
- Give the Door Override a name
- Select the Door Mode from the drop down
- Use Unlocked to unlock the door
- Use Card Only to remove the schedule from the door for that day (Snow Day)
- Select the Start Day/Time
- Select the End Day/Time
- Add a note so others when looking understand what is going on
- Select your school in the Partitions section
- Click Add
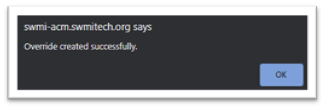
- After a few second a screen will display indicating the change was successful
- Click OK
¶ Viewing Override Schedules
- From the Doors section (Follow steps 1-4 in creating the override to get to the correct page)
- Click Overrides at the top of the screen
- Selecting the overrides at the top of the screen will show you all overrides that apply to your district
- Or Click the Blue circle by the door you wish to check
- Selecting the blue circle for the door will only show you overrides that door is present in
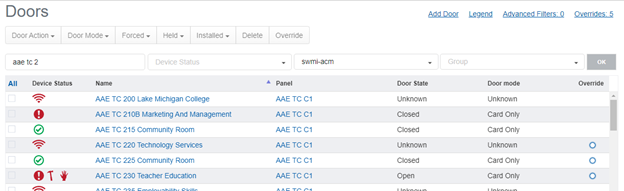
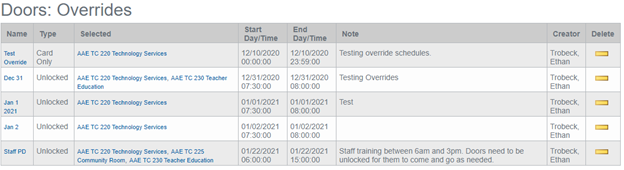
- Which ever is selected will get you a view that looks like the one below
- Name = the override job name (See Editing Override Schedule)
- Type = Door Mode
- Selected = Doors that the job will be applied to
- Start Day/Time = when the job will start
- End Day/Time = when the job will end
- Note = the notes for that override job
- Creator = the person who created the job
- Delete = delete the job (See Deleting Override)
¶ Editing Override Schedule
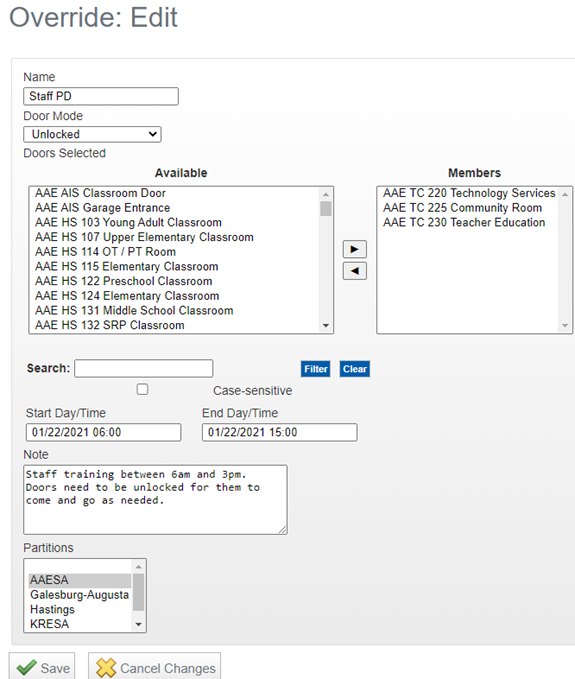
- Selecting the Name of the override will let you edit the job
- You can Change the name of the job
- Change the door mode
- Add or remove doors
- Change the Start Day/Time
- Change the End Day/Time
- Change the Note
- Click Save to make changes active
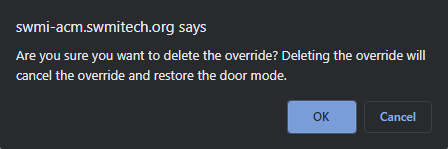
¶ Deleting Override Schedule
- Clicking the yellow minus button will delete that override job
- Image below shows what happens when selecting delete
- Click OK to complete the action